Job Management
Copy Article URL
Use this guide to create a job in Ovii with the right identity, responsibilities, ownership, application routing, and publish status before the role goes live.
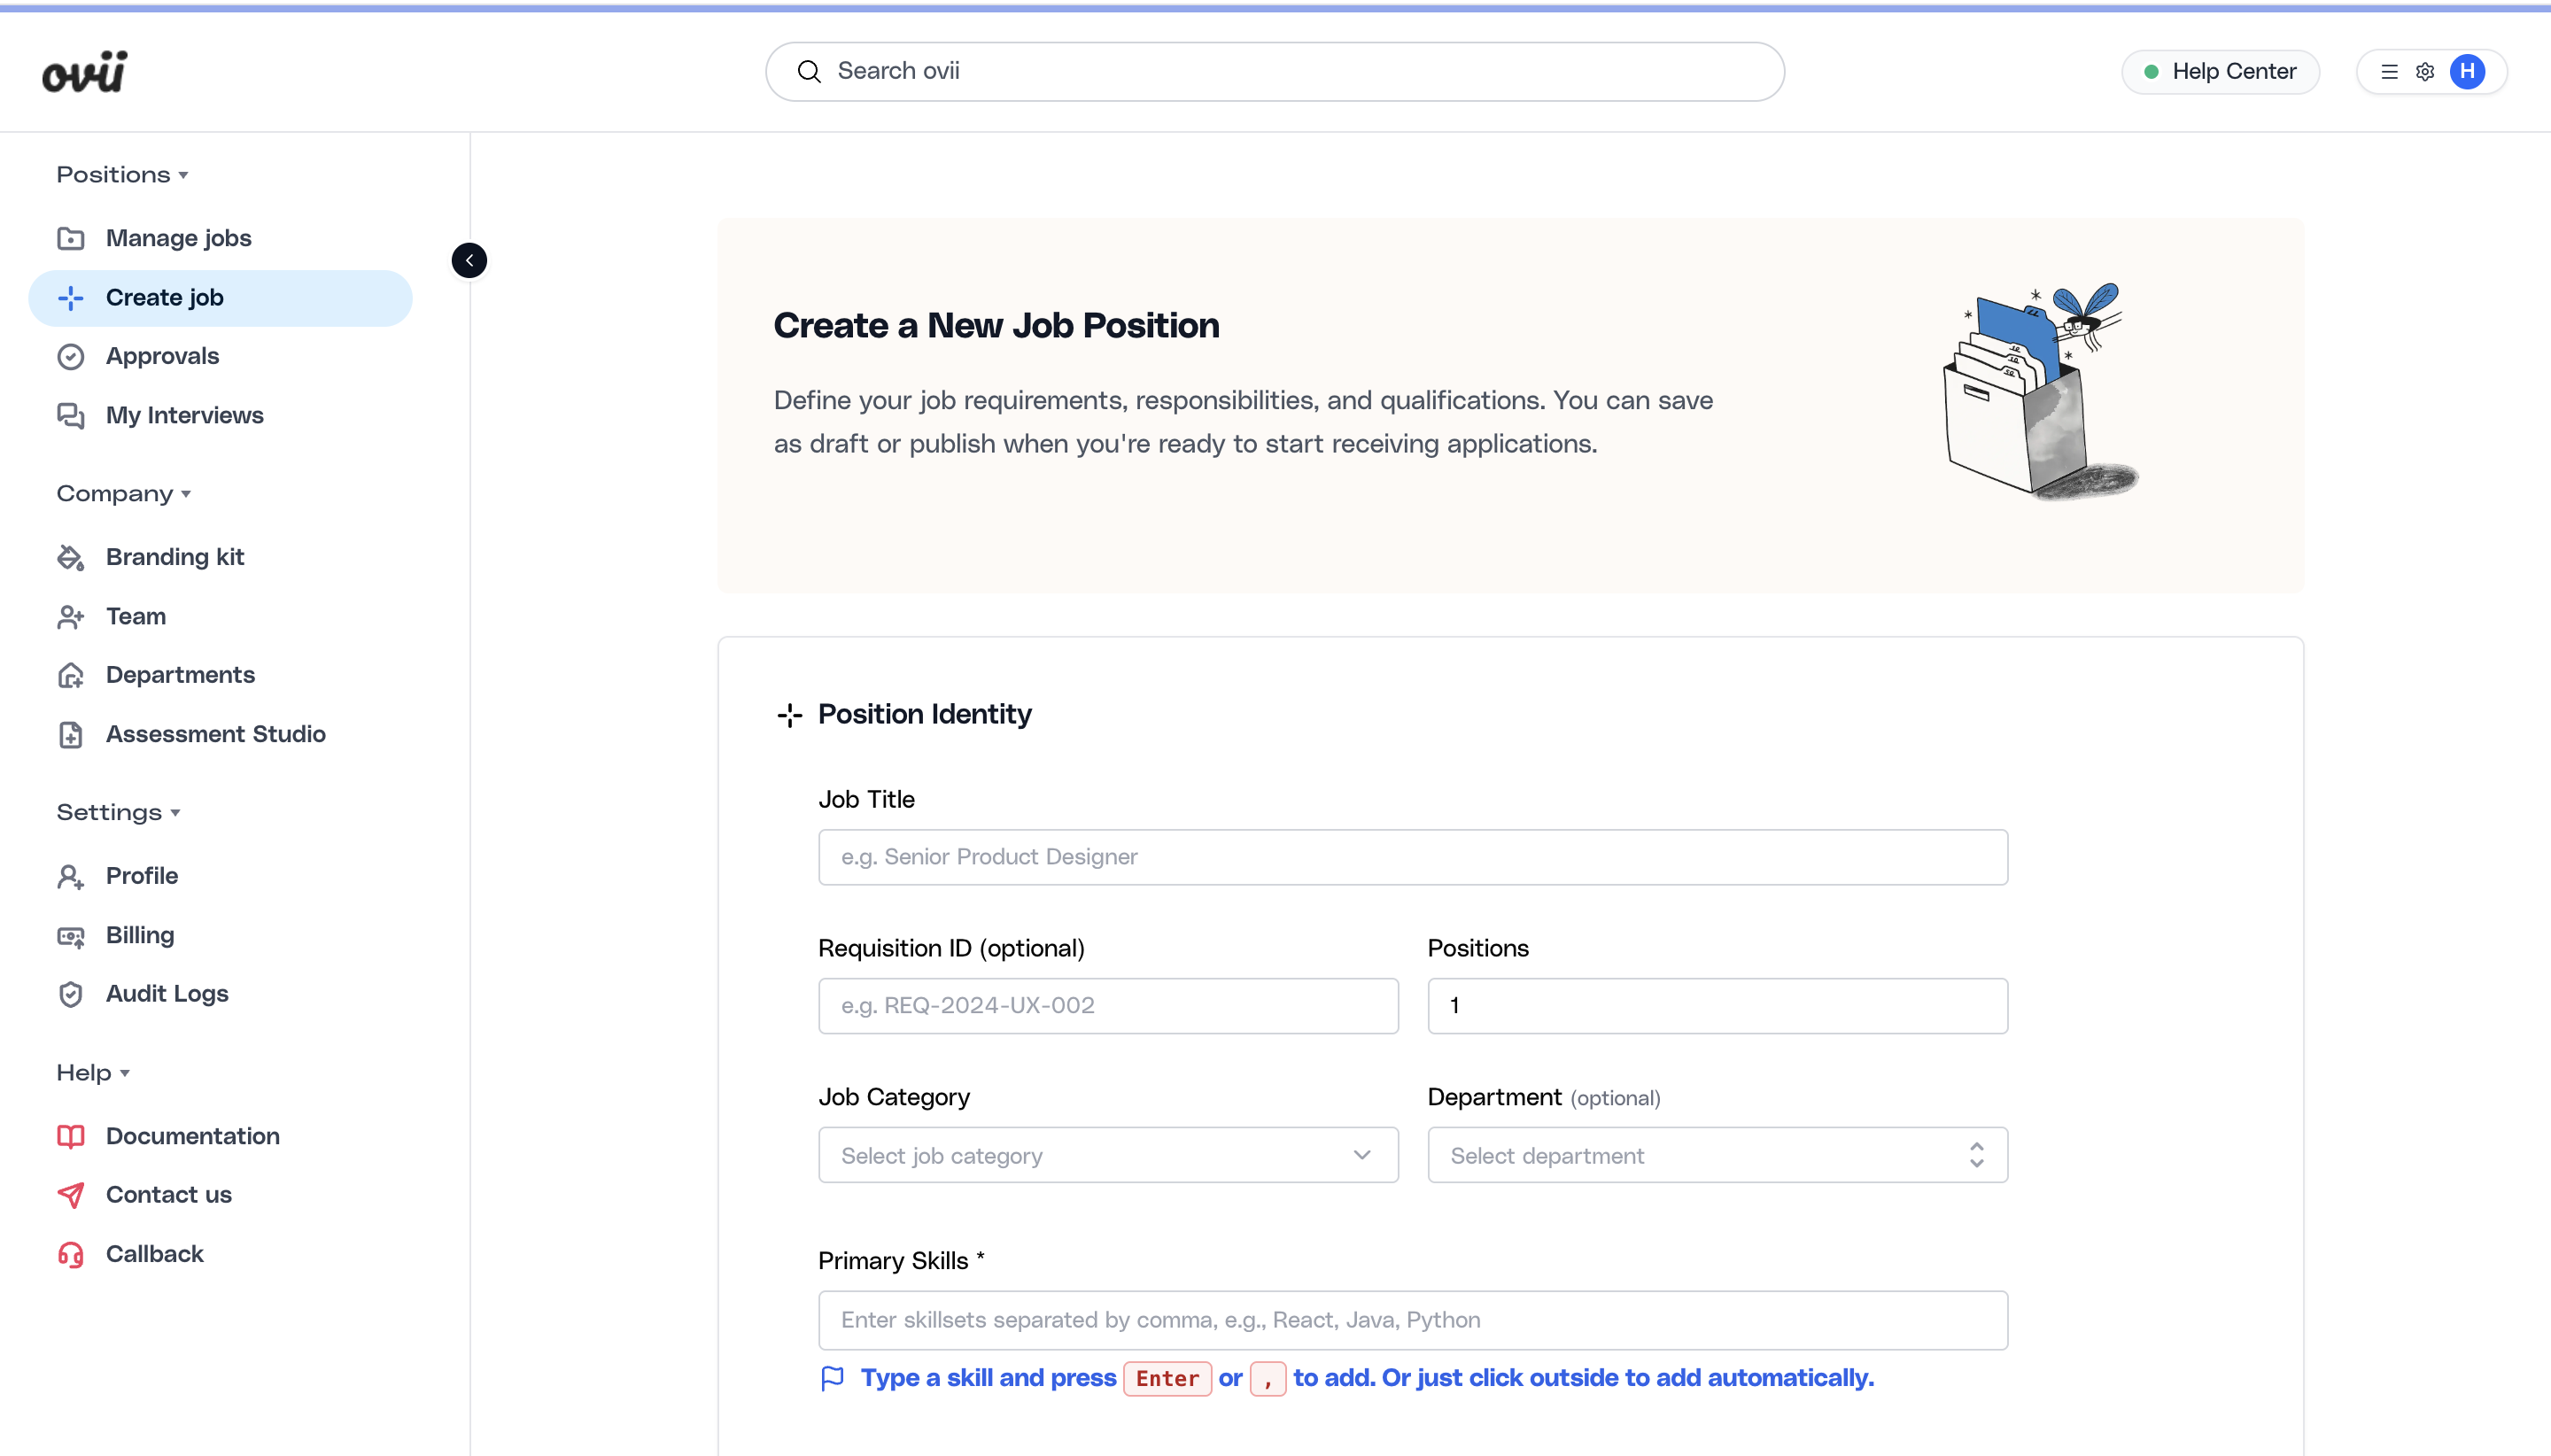
Set the position identity
Start the create-job flow by defining the role itself. Position Identity is where you set the job title, requisition identifier, number of openings, job category, department mapping, and skill tags that anchor the rest of the workflow.
These fields matter because they drive how the role is classified across search, reporting, approvals, and downstream candidate review. Complete this section carefully before moving into narrative job details or workflow controls.
Complete the core job identity fields
Add the job title, requisition reference if your team uses one, the number of openings, job category, department, and the primary skills that define the role. Use the most operationally accurate values because they affect later matching, filtering, and internal ownership.
Write the role summary and experience expectations
Use Role Summary and Expectations to define what the candidate is being hired to do and what level of experience the role requires. This section includes the experience range and the full job description used across candidate-facing job presentation and internal review.
Keep the description grounded in the actual responsibilities, expected scope, and must-have skills for the role. This is also where the system can support drafting help such as JD Summary, but that feature should be treated as an assistive step rather than the full source of your hiring decision.
Set the experience range and description
Enter the minimum and maximum experience range, then add the job description. Make the description usable by both candidates and internal reviewers: responsibilities, expectations, required qualifications, and core skills should all be clear.

Note
JD Summary is available as part of the broader job-description workflow, but it should be covered as its own help topic. In this article, focus on producing a clear and accurate job description rather than relying only on generated summary output.
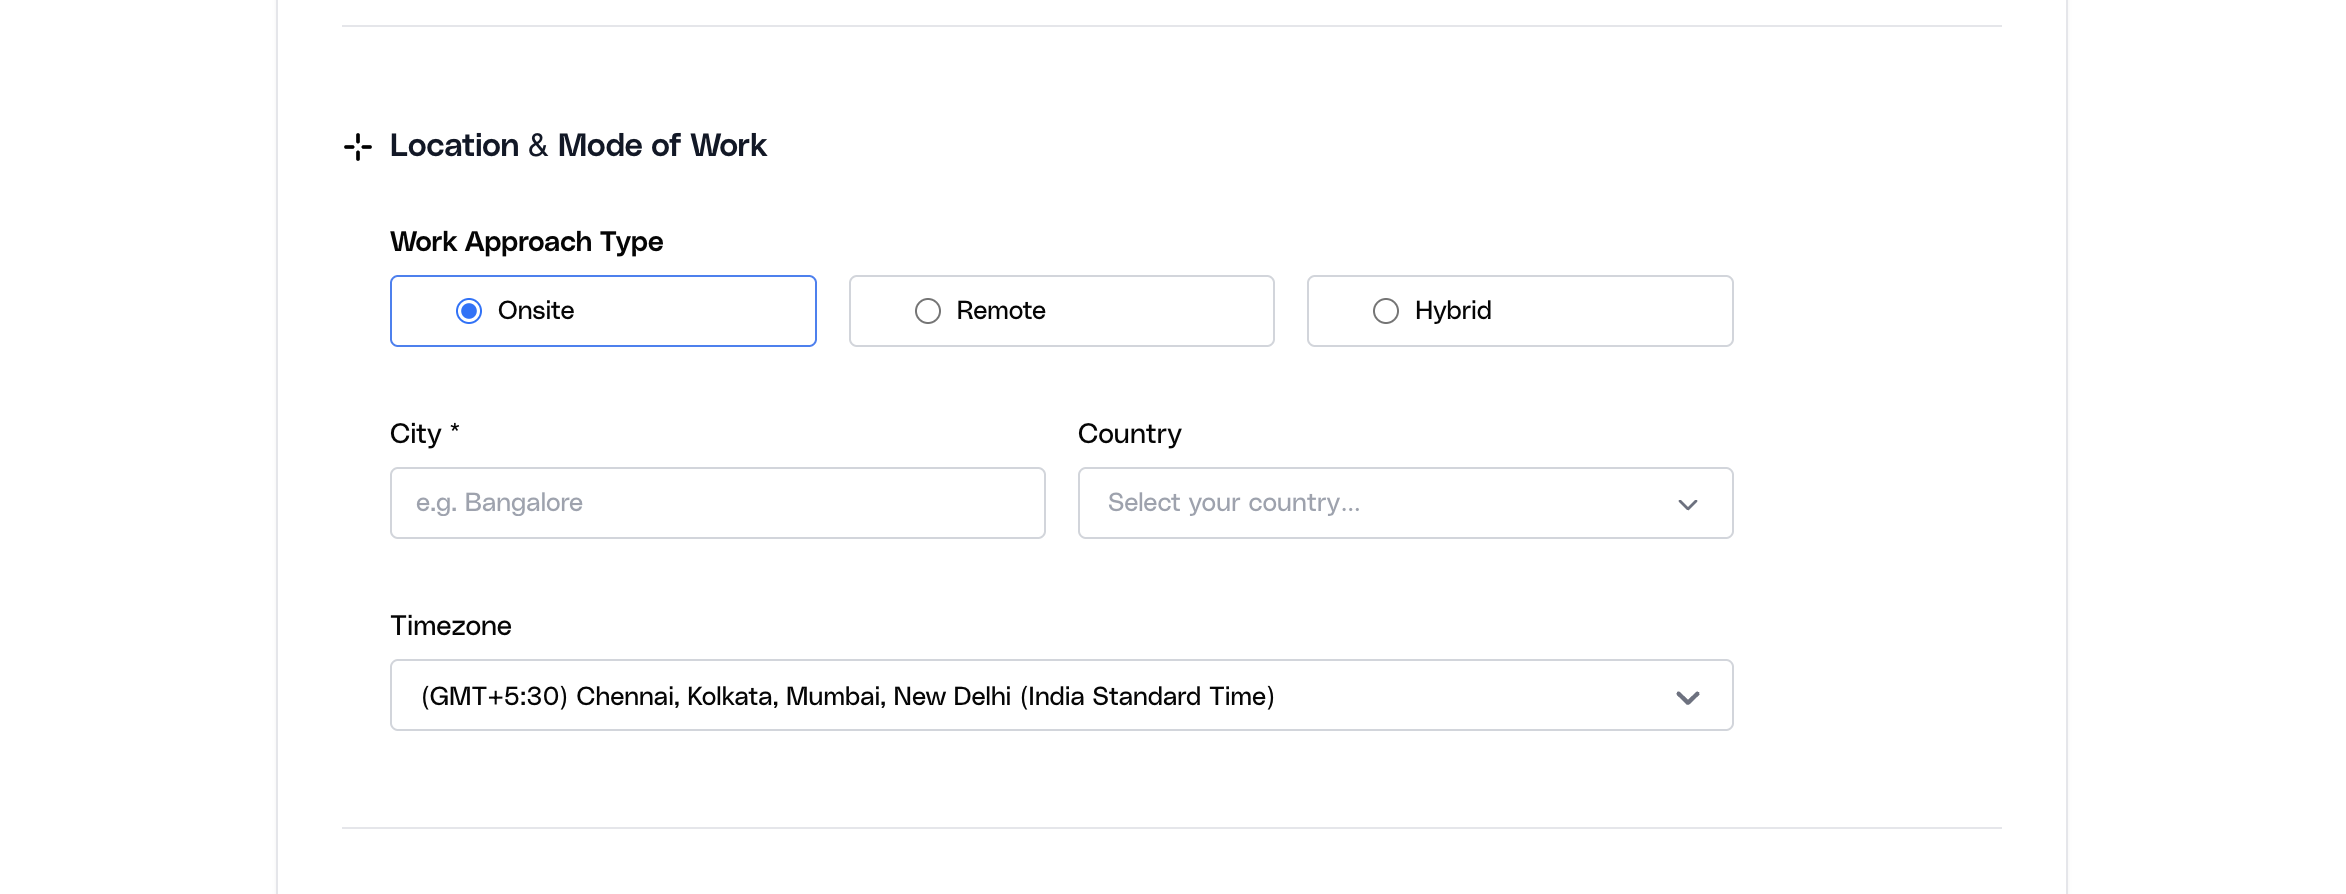
Define location and mode of work
Location & Mode of Work defines where the role is based and how the candidate is expected to work. The create-job form requires the work mode, country, and city, and supports timezone where needed.
This information affects candidate expectations and helps keep geographically sensitive hiring organized correctly. Use Onsite, Remote, or Hybrid intentionally instead of defaulting to a generic value.
Capture the working model and location details
Choose the work arrangement, then enter the country and city that should anchor the role. If the role is remote or distributed, still use the location fields to reflect the actual hiring geography and coordination context.
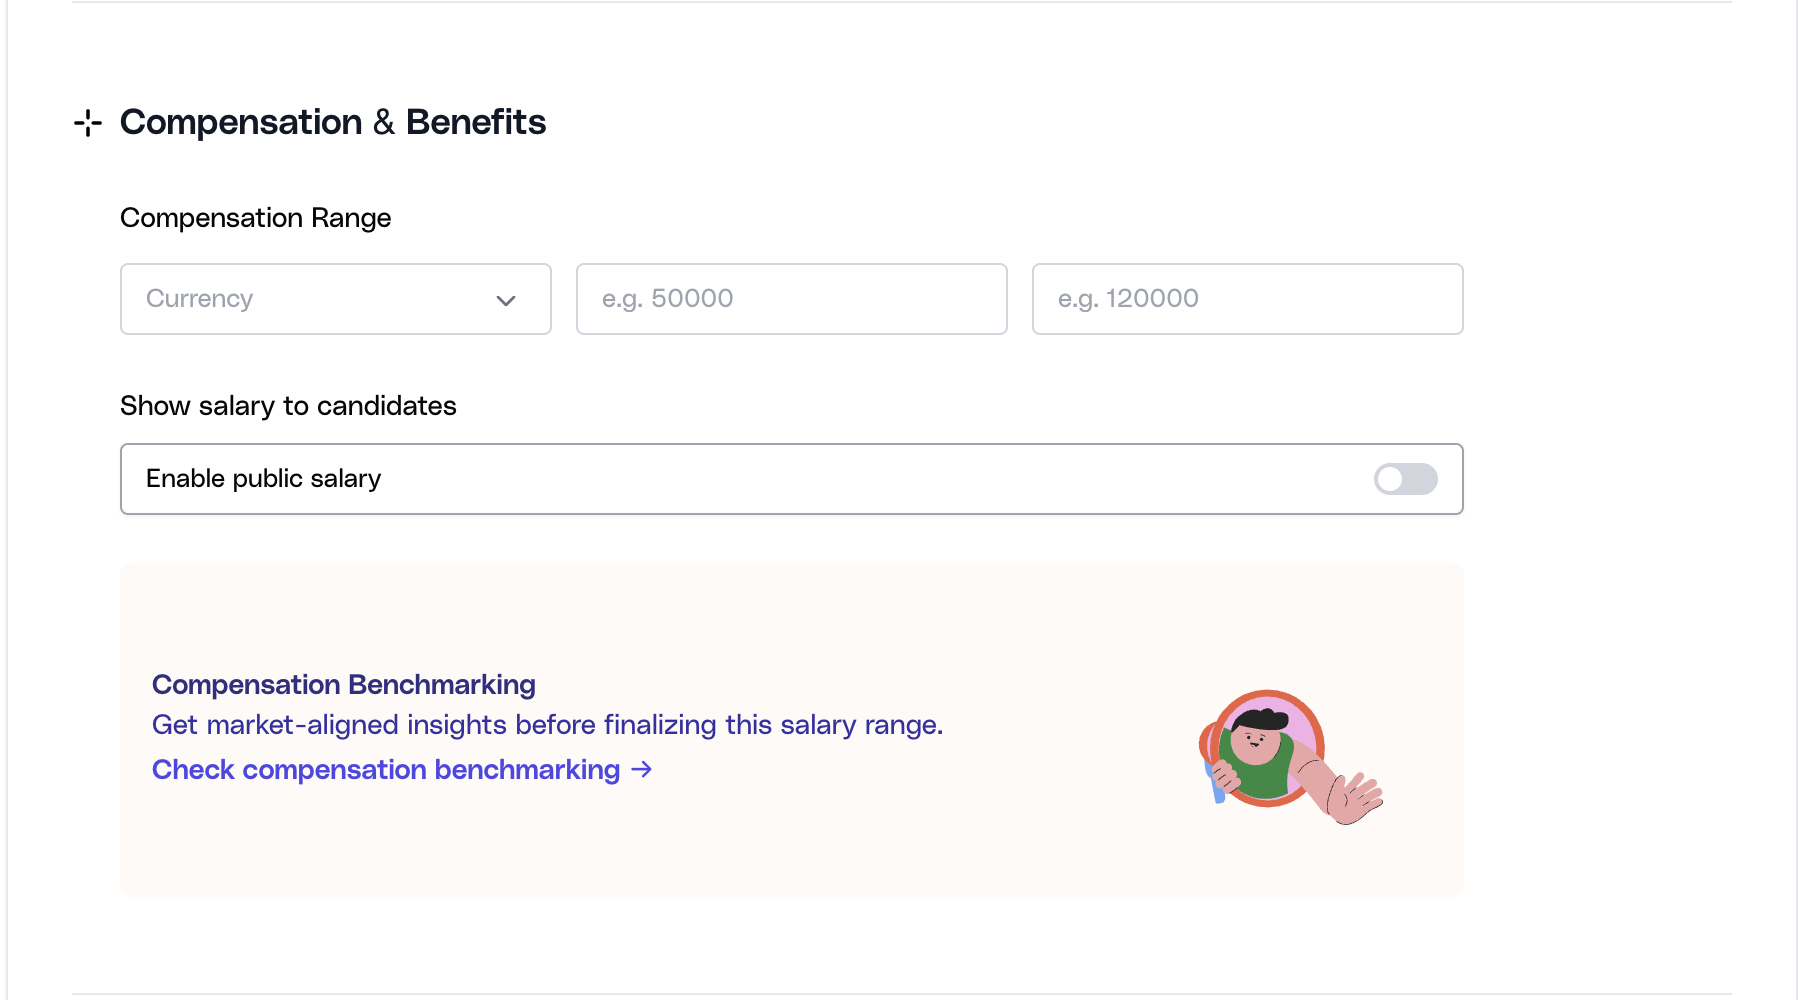
Set compensation and benchmark context
Compensation & Benefits starts with the salary inputs that the job record needs: currency, salary minimum, salary maximum, and whether salary should be shown to candidates. These fields support the operational compensation range of the role.
The create-job form also includes Compensation Benchmarking. That feature relies on the core compensation inputs being present first and is best treated as an enrichment or market-reference layer rather than the first step in defining compensation.
Complete the compensation fields before benchmarking
Set the base compensation range and currency first. If your team uses benchmarking, open it only after the manual compensation fields are complete so the market comparison has the right role and pay context to work from.
Note
Salary Benchmark will be covered as its own help topic. In this article, the key point is that compensation fields must be set correctly before you rely on benchmark insights.
Add benefits candidates should see
Use the Benefits section to describe the non-salary value of the role. This can include insurance, time-off, learning support, remote-work support, equity, recognition, or other perks your company actually provides.
Benefits improve role clarity and can materially influence candidate conversion. Choose them intentionally rather than as filler.
Select the benefits that truly apply to the role
Add the benefits your company provides for this job. Keep the list accurate and current so the published role reflects the real offer and avoids candidate confusion later in the process.

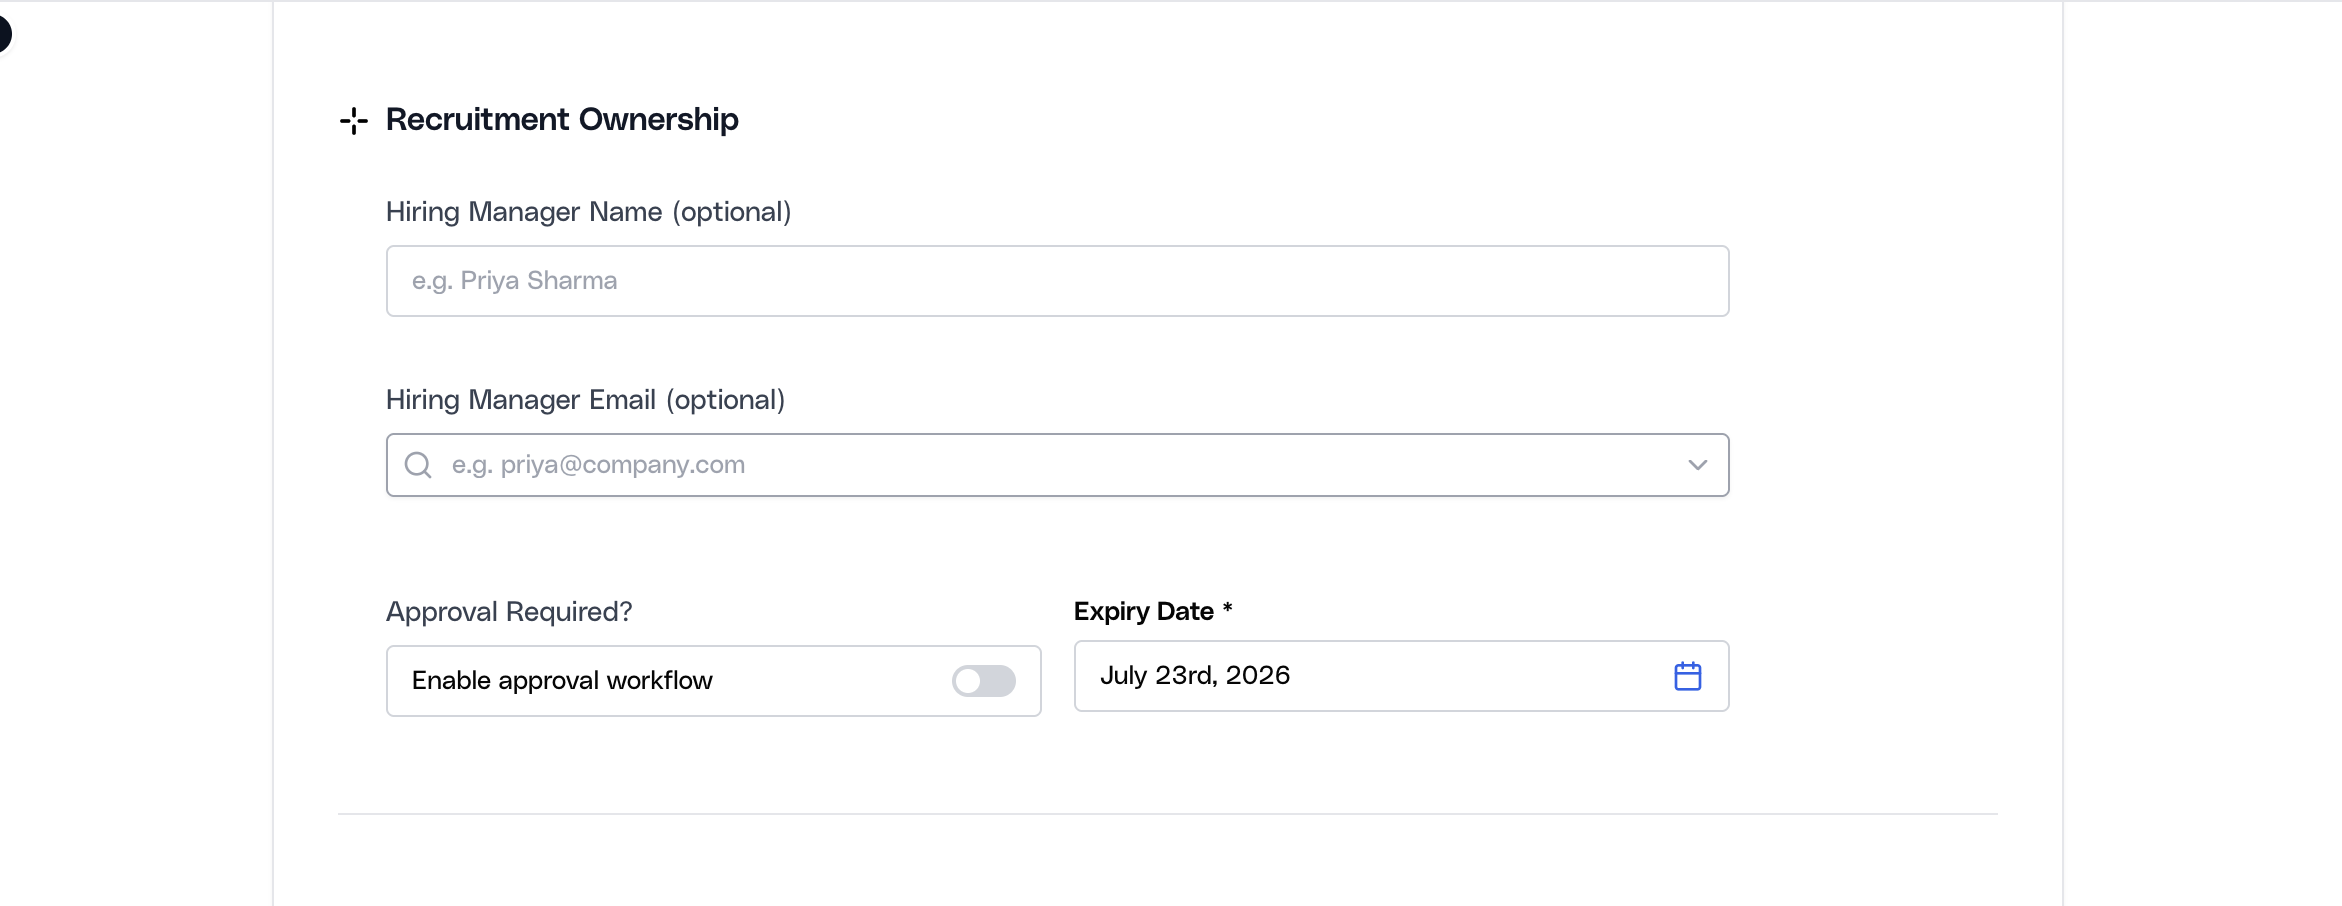
Configure recruitment ownership and approval routing
Recruitment Ownership defines who is accountable for the job internally. This section captures the hiring manager, expiry date, and whether the role should move through an approval workflow before publishing.
If approval is enabled, approver details must be set correctly before the job can be sent for approval. The create-job controls also prevent direct publishing when approval workflow is active.
Use approval routing for roles that require finance, leadership, or hiring-control review before they become live. If a job does not need that review, keep the ownership details accurate anyway so downstream accountability is clear when the role is published.
Assign the hiring manager and approval setup
Add the hiring manager details if your team uses them, set the job expiry date, and decide whether approval is required. If approval is turned on, add the approver details now so the role can move into PENDING_APPROVAL without friction later.
Note
When approval workflow is enabled, Publish is intentionally blocked until the role is either sent for approval or saved as a draft.
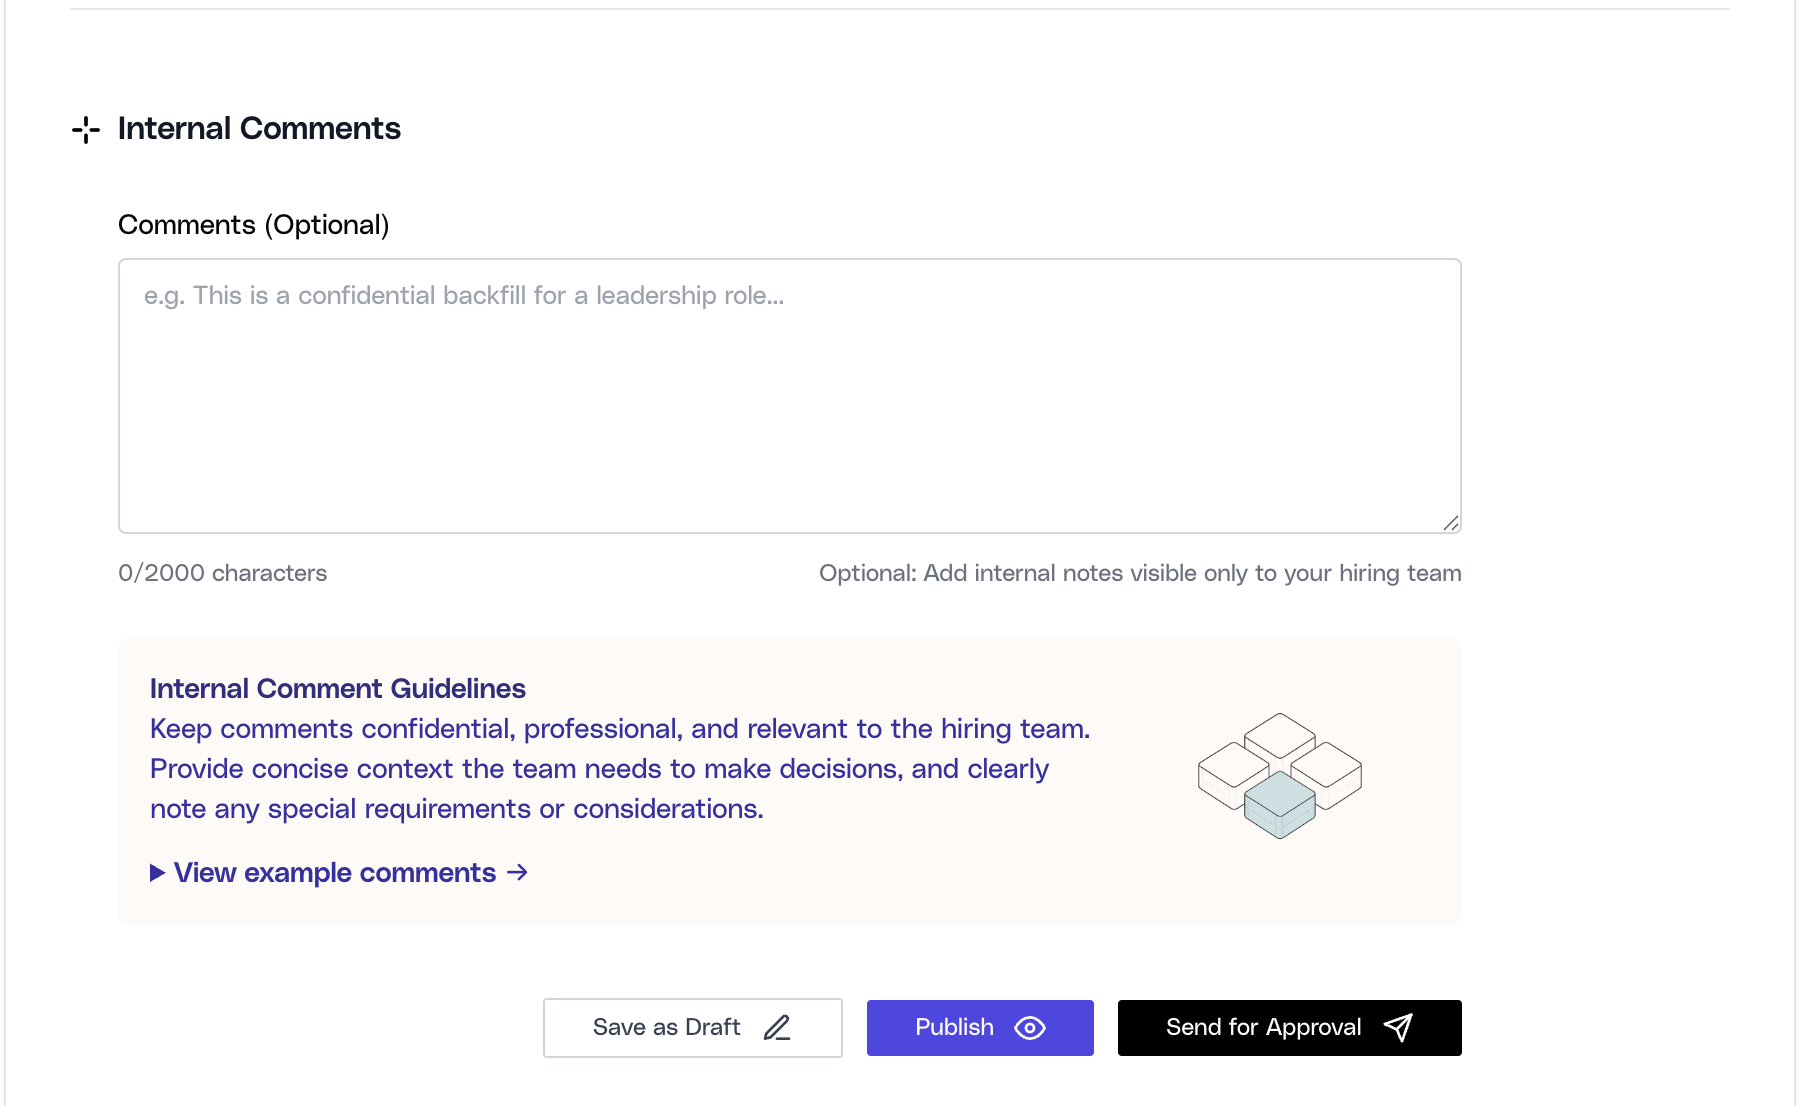
Capture internal comments for the hiring team
Internal Comments gives your team a place to record context that should stay inside the recruiting workflow rather than appear in the candidate-facing job description.
Use this space for information such as hiring context, internal constraints, non-public notes, or reminders that help the recruiting team align around the role.
Add internal-only context where useful
Record the comments that recruiters, hiring managers, or approvers need to remember while working the role. Keep these notes professional and operational, since they become part of the internal job record.
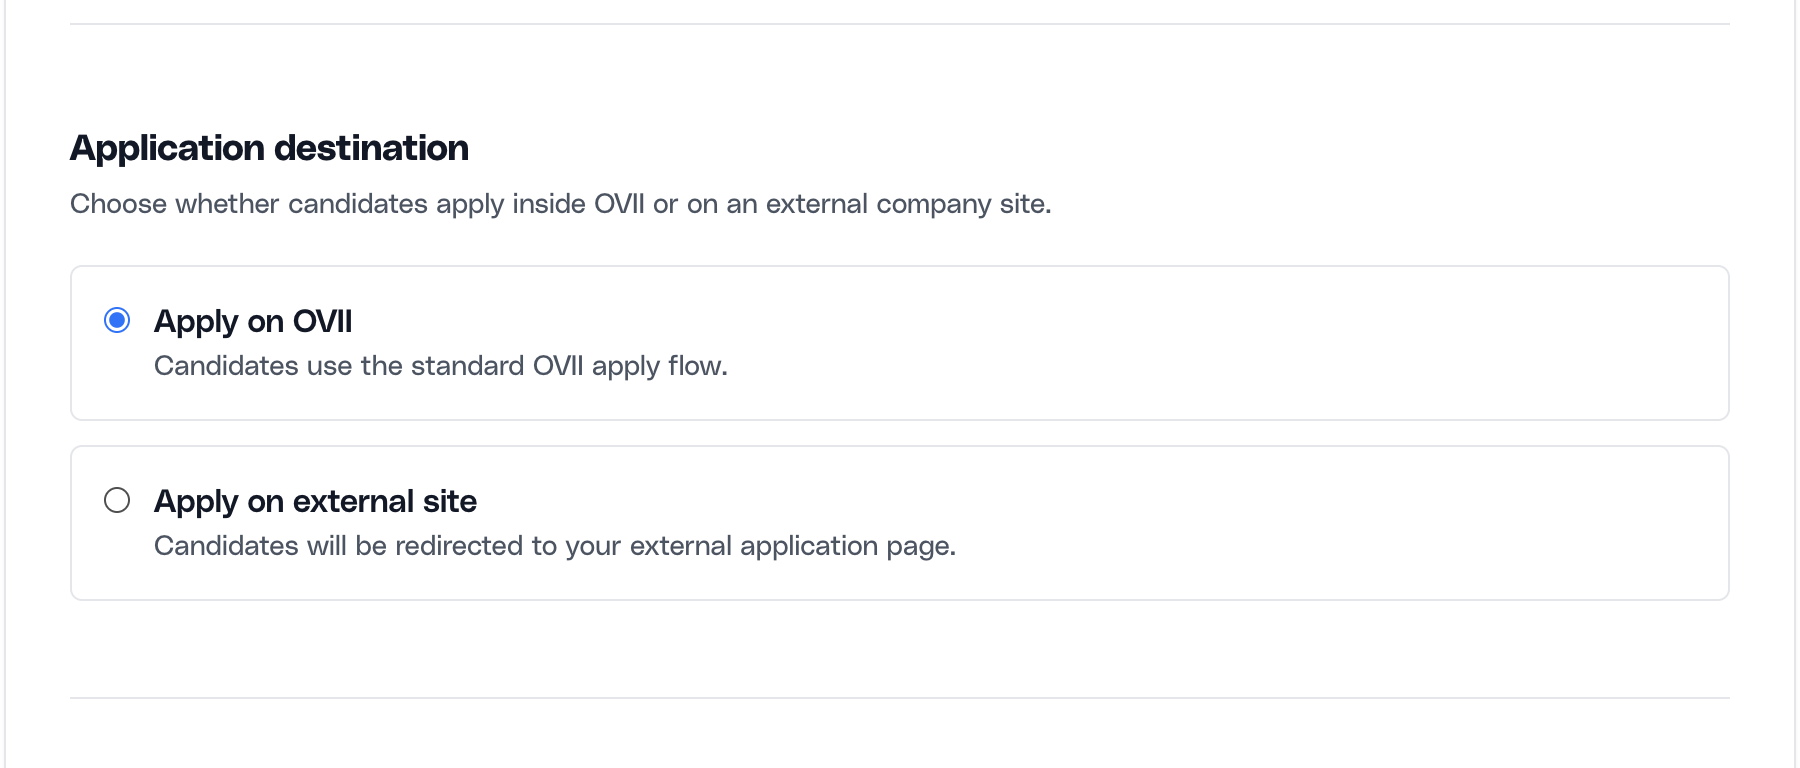
Choose the application destination
The create-job form supports different application routing modes. By default, roles can use Ovii Direct, but the form also supports external application URLs when your process requires candidates to apply somewhere else.
If you select an external destination, the form validates that the URL is present and uses a secure `https://` address. Use this mode only when your process truly needs external routing.
Before publishing, confirm that the application destination is the final one you want candidates to use. Incorrect routing is one of the fastest ways to create candidate drop-off after a role goes live.
Set how candidates should apply
Choose whether candidates apply directly through Ovii or through an external application URL. If you use an external destination, verify the link carefully before publishing because candidate drop-off often starts with incorrect application routing.
Save, publish, or send the job for approval
The final action area controls the job status. The current create-job workflow supports Save as Draft, Publish, and Send for Approval.
Use Draft when the role is still being prepared, Publish when the role is ready to go live immediately, and Send for Approval when the job must move through approver review before it can become visible.
Before you publish, do a final operational check: position identity should be accurate, the job description should be candidate-ready, ownership and approver fields should be complete, and the application destination should be correct.
The same page also supports edit mode for existing jobs, and approval mode for approvers reviewing a pending job. That means this form is not only for creation; it is also the controlled surface for updates and approval outcomes.
Note
If the job is in a read-only terminal status such as Closed, Archived, or Expired, the action controls are intentionally restricted.
Note
Approval and rejection outcomes are better documented as part of the approvals workflow, but it is important to know that they are triggered from the same create-job surface when the user is in approval mode.
Note
Publish only when the role is ready to receive applications immediately. Once live, candidate traffic and internal workflow both start from the assumptions captured in this form.